Landscape Lighting for Winter
Landscape lighting isn’t just a Spring project. The longest night of the year is December 21/22. It is dark already when you come home and often still dark when you leave in the morning. Here are some ideas for outdoor lighting for safety and security that are easy to install and don’t use a lot of electricity to operate.
Create a landscape lighting plan. Draw a sketch or map of your yard.
Be sure to position fixtures so lights won’t shine into people’s eyes, into windows or into other people’s yards.
- Pathways
- Steps & Stairs
- Entrances
- Lawn Ornaments
- Fountains or Water Feature
- Natural Features
- Areas an intruder might hide
Mark on your plan any areas you don’t want to feature.
- Garbage Cans
- Heating or Air Conditioning Units
- Fuel Tank
- Dog Run
- Wood Pile
Draw in the areas you want light. Then decide how to light them. There are a lot of options.
- Path Lighting
- Step Lighting
- Accent Lighting: Direct light at an object or area.
- Downlighting
- Uplighting
- Silhouetting: If you wash the area behind something, you make it stand out.
- Spot Lighting: Direct the light directly at something.
- Reflecting: If you have a body of water, light something near it. It will be reflected. This is a really beautiful effect.
- Underwater lights
The higher the fixture is mounted, the wider the area that can be lighted with a single fixture. You can control the light using a shroud or a lens. A shroud cuts off the light so that it doesn’t intrude where it is not wanted. A spread lens spreads the light to a wider area. A linear spread lens elongates the beam.
Many lights can accept light bulbs with varying beam spread. A flood will light a larger area. A spot will narrow the beam and the light will appear brighter.
So, now draw onto your landscape plan the location of the fixtures. Decide where you can locate your transformer. Draw a line from the transformer to each fixture.
This is a landscape plan from Hadco. The dotted line is the cable.
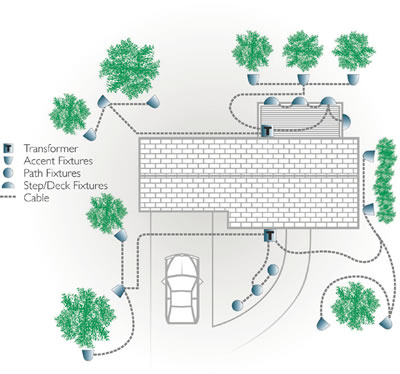
“Draw a dotted line from the power console to each fixture to denote the cable, remembering to center feed each group of fixtures. Try to avoid running the cable under walks and drives more than once to help eliminate the need for extra work when installing.” Hadco’s Landscape Installation Guide (PDF will open in new window)
Design your cable layout. Avoid straight runs or the lights closest to the transformer will be brighter than the ones further down the line. If your runs are going to be very long, use higher gauge cable for the main leg.
Measure your cable. Be sure to get extra so it isn’t tight. It’s not that expensive.
Add up the wattage of the fixtures. Your transformer should handle this much wattage. If you might add more lighting later, get a bigger transformer.
Decide how much you want to spend and the quality of product you can afford.
You don’t have to do everything at once. Purchase the transformer for your ultimate plan, then add the fixtures little by little. Or buy low cost fixtures now and upgrade to higher quality longer lasting fixtures later.
Consider adding:
- A timer to turn the lights on and off at predetermined hours.
- A Photocell switch to turn the lights on at dusk and off at dawn
- Remote Control
- Motion Detector to turn the lights on when someone approaches, then turn the lights back off.
Installation is easy and fast
Follow any instructions that come with your lighting.
1-Screw the transformer to the wall near the outlet one foot above the ground.
If you have a photo cell, mount it away from any artificial light sources, such as street lights or light from your windows.
2-Lay fixtures as close as possible to where they will be installed.
3-Lay out the cable along your plan. Be sure to keep it loose.
4-Connect the cable to each fixture and to the main cable using cable connectors.
5-Connect the low voltage cable to the transformer.
Plug in the transformer.
6-Test the system. Make sure everything is lighting up before you bury the cable. You might want to wait until the sun goes down to make sure that everything is right.
7-Cover the cable with mulch or gravel where it runs through beds.
Cut a slit in the grass and push it in where it crosses the lawn.
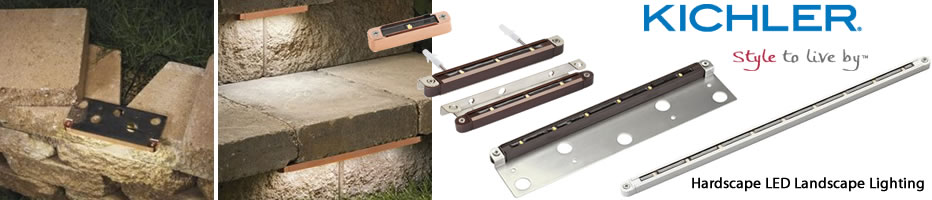
Landscape Lighting Kits are reasonably priced and easy to install. Kits are available with spot lights, flood lights or both.
Kichler LED Landscape Lights >
Versatile LED Solutions Kichler LED accent lighting helps showcase landscape features with true, clear, warm, white light without intruding on the scene.
Hinkley Hardy Island Landscape Lighting Collection >
Spot lights, flood lights and wall wash lights coordinate with pathlights, well lights, deck lights, steplights and brick lights for a complete landscape lighting design.
Hinkley Nexus Landscape Lighting >
High quality, high style aluminum path lights, deck lights, wall lights and sign lights. LED Finished in bronze.
A variety of inground and well lights and kits from Eurofase, SLV Lighting, Kichler, Dabmar, Hinkley and Hadco Lighting. Light sources are LED, MR16, GX53/GX53, PAR20 or PAR30.
Share this:

Discover more from my design42
Subscribe to get the latest posts sent to your email.